
The route of the Dragonpipe (officially, the Mariner East 2 pipeline) is currently (summer 2017) a series of worksites. I’m finding that you can tell a lot about what’s going on by just looking at what’s present at the site. So I’ve written this post as a field guide to the pipeline construction process.
Is the construction really for the pipeline? Of course, there is lots of other construction going on this summer. There is road repair, sewer work, housing and commercial building, and other work besides the pipeline. Take a look at map of the Dragonpipe (such as the one here, which can be zoomed in on your local area). All of the pipeline work (except a few pipe storage areas) is within 50 feet of the red line on the map.
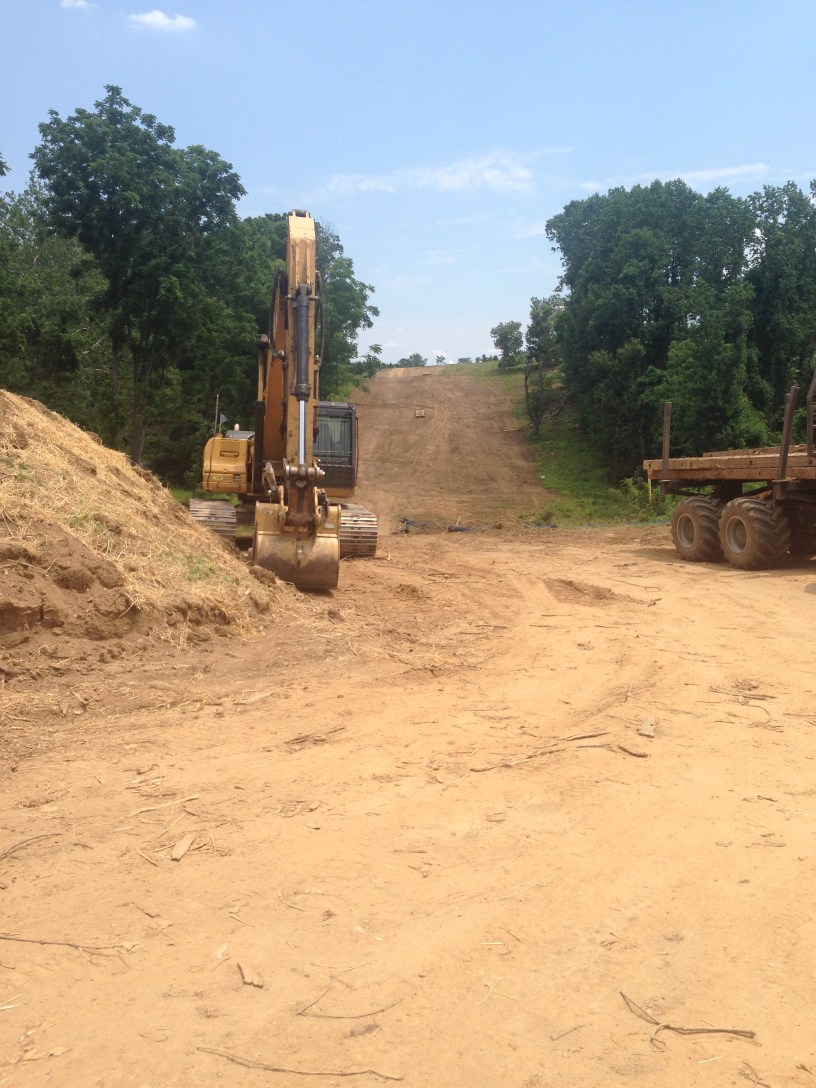
Is it drilling, trenching, or something else? Two methods are being used to install pipe: trenching and drilling. Trenching, like it sounds, is digging a trench to a four-foot depth, dropping in the pipe, and covering the trench. In a site involving trenching, you will first see all the trees and shrubs being removed along the route of the pipe. Then, you will see the trench being dug and long sections of pipe being welded together alongside the trench. Here is a photo of trenching preparations near Linvilla Orchard. A power excavator (like the one shown) or a specialized rotary trencher may be used for digging the trench.

Drill sites. The alternative to trenching is drilling (“horizontal directional drilling”, to give the full name). At a drill site, you will initially see the site being leveled and covered with thick wooden planks (these will support the heavy equipment, including the drill itself). The site will be smaller than a trenching site (perhaps 40 or 50 feet wide and extending up to a few hundred feet along the axis of the pipeline route).
At a drill site, a drill will be angled into the ground. A pilot hole will be drilled in a path that arcs downward into the earth, then back up to emerge at another site farther along the pipeline route. (Some of the details of this process will be the topic of future posts.) The pilot hole is enlarged and the pipe is then pulled through it.
Near the drill, you will see a trailer load of drill pipe, used for drilling the pilot hole. Later, at one end or the other of the hole, you will see the pipe that will be pulled through. The sections of drill pipe for the pilot hole are relatively small (perhaps 9 inches in diameter) and generally rusty from previous use. The pipe for the pipeline itself is new and 20 inches in diameter.
Here is a photo of the drill at the Judy Way site in Aston. You can see the rust-colored “drill string” (the sections of drill pipe that are involved in drilling at the moment) going down into the ground. To the right of the drill is a trailer with several lengths of additional drill pipe on it. In the foreground is the “mud pit”.

The mud pit is always found where the drill goes into the ground. The “mud” is drilling fluid that has been sent down the drill pipe to lubricate the drill bit. The drill bit is larger in diameter than the drill pipe behind it, so there is space in the hole being drilled for the fluid to flow back along the outside of the drill pipe until it returns to the surface, where it gushes out into the mud pit.
Something else? Apart from trenching sites and drilling sites, you may see a few other indications of pipeline activity. For one thing, Sunoco/ETP has built access roads to some of its sites that are not accessible from the main roads. There is also what appears to be a pipe storage and staging area off of Ship Road, south of Exton, underneath the power lines. And in some locations, you will see guide wires running along the ground near the route of the pipeline. These are part of the system used in guiding the drilling process.
